On August 3, 1999, Spectrum Zone, the predecessor of Computer Emuzone [CEZ], was launched. So, we are celebrating our 25th anniversary, and it is worth saying so, even though we have not been able to prepare anything special. We will continue here as long as we can. Thanks for everything!

Working title: Infrey Quest
Genre: Videoadventure
Type: Isometric
Distribution: Commercial
| Rating | Votes |
| 7 | 1 |
 7
7
 7.6
7.6
OTHER VERSION

IF YOU LIKE IT...


Graphics: Rubén Ángel Gómez
Music: Alberto José González Pedraza
In CEZ and other CEZ Zones
 walkthrough
THE ADVENTURES OF PINOCCHIO - FULL WALKTHROUGH / GENERAL INFO GUIDE v1.0
Author: Wlokos (Matt Sokol)
Email: WlokosFAQ@hotmail.com
AIM: WIokos - I'm often away, but I'll read every IM eventually.
Latest update: 7/20/06
The [ABC], [ABD], and so on tags are for quickly getting to any section of this
guide. Hit Ctrl and F at the same time, then enter that tag (complete with
brackets), and you'll be brought to that section of the guide.
TABLE OF CONTENTS
0. Very Important Information [ABC]
1. Introduction [ABD]
2. Walkthrough [ABE]
3. Enemies [ABF]
4. Glitches/Oddities [ABG]
5. Level passwords [ABH]
6. Possible future updates [ABI]
7. Credits [ABJ]
---***---
[ABC]
---
A few notes to the reader:
For the sake of this guide:
Assuming the room to be on a compass, where North points towards the 'ROOM'
counter at the top left of the screen: North = Up, South = Down, West = Left,
East = Right. It doesn't matter if your character starts out facing west and I
say left, you still go west.
Because this a 3D game for the gameboy mono, some of the graphics aren't so
good. I've had to name all of the enemies and objects, as I have no
instruction manual, but the graphics made the naming process more of a guessing
game than anything. I'm pretty sure 'Dog' isn't really a dog, for example.
Sorry if any of the terms are different from the official ones.
---***---
[ABD]
---
Well, you're either randomly reading this guide for some unknown reason, or
you've decided to play The Adventures of Pinocchio (hereby AoP). If it's the
former, go get AoP right now, because it's a very fun game. If it's the
latter, that's awesome. I suggest trying to beat it without the guide first,
because it's much more fun that way. Still, if you need help, this guide
should be very useful to you. If you notice any errors in the guide, or any
omitted info, please let me know. Send me an email at WlokosFAQ@hotmail.com,
even toss me an IM at WIokos (remember, that's an i, not an L). Also, I'd love
to hear some feedback, either good or bad, if you want to send that too. Just
don't send hate mail, that's a waste of both of our time. Anyway, be sure to
put 'Pinocchio' somewhere in the email's title, so that I know which game the
email's about. I only have two guides right now, but as I write more, I'll be
having all the email go to one address, so that'll help keep me organized.
Thanks a lot.
And, with that said, it's time for the guide. Enjoy.
---***---
[ABE]
---
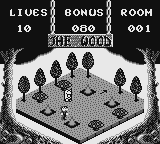
ROOM 01
DIFFICULTY: 1/10
This room's pretty simple. There are four spikes, in a rectangle formation.
Also, a dog walks from one side of the room to the other. Walk parallel to the
lines that the spikes make, so as to not hit them, and either run past or jump
over the dog, as he walks from side to side. This shouldn't be a challenge for
you - if it gives you trouble, you might want to go play Super Mario Bros. 1 or
some other easy game.
---
ROOM 02
DIFFICULTY: 2/10
This one's also very easy. You've got two paths you can take to get through.
One is to go forward, jumping over the spikes. Run over the two squares, and
jump again. Turn left, and jump one last time. You win. The other option is
to run to the left, up the side, and then turn and jump onto the second to last
platform. Jump over the only other bit of spikes, and you win again. Onto
room 3!
WARNING: The two squares in the middle dissolve as soon as you land, so run
over and jump off of them as fast as you can.
---
ROOM 03
DIFFICULTY: 3/10
It's getting a bit harder, now. The first thing that you want to do is jump
your way to the top of the stair-formation of blocks that's in front of you.
After you reach the top, jump over the small gap (if you fall, you'll hit lava
and die), and land on the stack of blocks in the corner. Next, make a big jump
to the right, so you land on that block that sits next to the spikes. It'll
start moving up and down. Wait for it to reach the very peak of its path, and
then jump over the spikes, onto the next corner's stack of blocks. Jump again,
upwards, onto the circle that's sitting amidst another batch of spikes. You'll
bounce off of it, providing you the height you need to propel yourself over the
final group of spikes, and onto the finish block. Done.
---
ROOM 04
DIFFICULTY: 2/10
Here we go. This is the first room that might leave you a bit confused on how
to beat it, although it's still very simple. Start out by running off of the
platform that you started on, and run towards the clear block/cylinder. Jump
onto the block, and then jump from the block to the cylinder. Next, jump over
the wall made of dark blocks. Be careful, though, because there's a ghost
running around on the other side. Time your jump so that it doesn't hit you
when you land on the ground, and then run to the goal arrow.
---
ROOM 05
DIFFICULTY: 2/10
I shouldn't even need to tell you to avoid the huge pit of spikes in the middle
of the room, but I will anyway. Walk straight ahead, until you get to the
stationary block and the moving platform. Jump onto the block, and when the
platform gets close, jump onto it. Once it crosses all the way to the other
side of the room, jump off, and run to the arrow. 5 down, 95 to go.
---
ROOM 06
DIFFICULTY: 3/10
The first thing that you'll want to do is move immediately, either to the left
or the right. If you don't, the dog will walk right into you and you'll die in
around 2 seconds, which is not fun. After that, jump up onto the platform that
has the block on it. This block isn't stuck in place, you can push it around.
Position yourself so that you're able to push it downards, and then just walk
into it to push it down. Jump down to the lower floor, and push it leftwards,
being sure to avoid the cat, so that the block is up against the wall. Jump
onto the block, and then onto the higher ground. Run to the arrow, and you
win.
---
ROOM 07
DIFFICULTY: 4/10
This room is a bit trickier than the last bunch. At first, it looks simple:
You're on a platform surrounded by spikes, and you just have to jump over a few
onto a floor with a guy (now known as Mean Guy) walking around and a moving
platform. However, if you land onto the floor that Mean Guy is walking around
on, he will immediately run at you at a very high speed, and he'll kill you as
soon as he hits you. To avoid that from happening, time your jump over the
spikes, so that you land on the platform, rather than the ground. Then, wait
for the platform to be as close to the arrow as possible (and preferrably, for
Mean Guy to be as far as possible), and then jump off towards it and run
directly at it. If you time it correctly, you'll get to the end before Mean
Guy can reach you. You might even land right onto the arrow. If not, try
again. It could take you a few tries.
---
ROOM 08
DIFFICULTY: 4/10
This one is frusterating, becuase it can be very tough to manuever between all
of the spikes. There are actually two methods to do this one: The way that
they intended for you to do it, and the faster method. The faster one is also
probably easier, so I suggest that you skip past this strategy to the Fastest
Method one below. Anyway, the first thing you should do is walk in between the
spikes until you end up directly to the left of the movable block. DO NOT PUSH
IT TO THE RIGHT. Jump over it, and land to the right of it, then push it to
the left until it's next to spikes. Go around the spikes again, until you're
up above it. Jump over it, so that you're on the other side,and push it up
until it can't go any further. Once you've done that, get onto the left side
of it, and push it until it's on the spikes. [BE CAREFUL: You can push it so
far that you walk onto the spikes, and that'll kill you.] Once it's on the
spikes, jump onto it, and then from it onto the arrow.
---
ROOM 09
DIFFICULTY: 4/10
This room is all about speed. When it starts, line yourself up with the three
blocks, and jump onto the first one. Walk up to the third one, but as soon as
you touch the third one, it starts moving from side to side, and you don't move
with it. The second that you touch it, jump to the left, so that you land on
the next set of blocks. However, as soon as you land on that block, it starts
moving too, so jump again and land on one of the other blocks, or the ground
that they're connected too. If you let either of those blocks start moving,
and you don't get to the next part of the level before they've done so, you're
going to die. I guarentee it. You can't be timid here.
---
ROOM 10
DIFFICULTY: 3/10
This is very easy. Run past the Dog, being sure that he doesn't hit you, and
jump up onto the highest block. From there, jump over the one square of spikes
and onto the next block. Get up onto the fence, and wait for the moving block
to move in front of you. Jump onto it. Once it gets close to the last bit of
land, jump off, and get onto the arrow.
---
ROOM 11
DIFFICULTY: 5/10
This room has a few tricky jumps, but there's not much of a puzzle to it, at
least. Run fowards, until you can jump onto the small block sticking up from
the ground. From there, jump onto the clear cylinder. Time your jump to land
onto the moving platform (which will probably take a couple of tries), and then
jump from the moving platform onto the landmass with the arrow. Short, but
frusterating.
---
ROOM 12
DIFFICULTY: 4/10
This one is tricky. You start out on the same floor as a Mean Guy, so it's
basically a race to the finish. Immediately run to the right, until you hit
the wall, then run up past both spikes. As soon as you're past the spikes
(incidentally, that also let you pass the ghost), run to the left/up and get to
the arrow before the Mean Guy has a chance to kill you. Boom, you win, enjoy
the bonus points.
---
ROOM 13
DIFFICULTY: 4/10
This is a very simple puzzle. You've got to get that movable block all the way
over to where the clear cylinders are. Start out by pushing the block towards
the top of the screen, until it can't be pushed any further. After it's gotten
that far, jump onto it, walking off of the left side. Push it to the right
until it can't go further. Jump onto it again (which is a bit annoying,
because of the moving platform overhead) and walk off the upper side, and push
it down until it's cleared all of the walls, but don't push it all the way
against the edge of the room. You need to be able to push it back up. Now,
push it to the right, and then up against the cylinders. There you go! Jump
onto the block, and then onto each of the cylinders, and finally onto the
moving platform. From the moving platform, jump onto the level-ending arrow.
---
ROOM 14
DIFFICULTY: 4/10
This isn't too tough, but it will seem weird at first. There's a Mean Guy
below you, and a bunch of platforms in the air. You've obviously got to jump
across the blocks and to the arrow, but it's tough to tell exactly where the
blocks are, because of the game's lacking graphics. (what do you expect, it's a
3d platformer on the GB mono). Walk to the upper-right edge of the platform,
and jump to the right. That'll get you onto the first platform. From there,
it should be self explanatory. Jump on each platform, and then onto the arrow,
to avoid the Mean Guy.
---
ROOM 15
DIFFICULTY: 5/10
This is just a bit of tricky jumping. Start out by getting onto the third
stair, next to the spikes. Jump up to the lowest platform that's over the
water. From that platform, jump leftwards to the next one. Jump left again,
but this next platform will crumble as soon as you land on it. Quickly, before
it's gone, jump onto the next one. This is a moving platform. Wait until it
gets as close to the arrow as possible, then jump directly left onto it, to
win.
---
ROOM 16
DIFFICULTY: 8/10
This level is incredibly frusterating. If you get angry easily, you might want
to attempt it in small doses. You start out in one corner, and you've got to
get to the arrow somewhere on the other side of the room. Oh, and there's a
huge field of spikes in your way. What you have to do is land around 6 perfect
jumps from space to space, including at least one diagonal one. Sound fun?
Here's the easiest path: Jump downwards, onto the weird black spot (not sure
if there's a purpose to that, which I'm unaware of?). Jump left from there,
onto the next empty space. Jump left again, and then jump down. Now you have
to do a diagonal jump, onto the only two spaces that are connected. From
there, it's one final upwards jump to get to the arrow. Much easier said than
done. Good luck.
---
ROOM 17
DIFFICULTY: 3/10
This is very, very easy. As soon as the level starts, run to the only block
that you can jump on, being sure to avoid the ghost. Jump from the block onto
the cylinders, up onto the very top corner of the room. Once you hit that top
corner spot, the ghost and the dog will both dissapear. Jump down to the
ground, and run to the arrow. You win.
---
ROOM 18
DIFFICULTY: 4/10
This level is fairly simple. Start out by running to the staircase of blocks,
taking care not to run into any spikes in the process, Jump up onto the very
top block. Now, this next jump is the only hard part of this level. Jump
forwards, but only enough to fall downwards. As soon as you fall below the
block you were standing on, move backwards while in midair, so that you land on
the arrow. You might not get it in one try, as it's a bit tricky, but it
shouldn't take too long.
---
ROOM 19
DIFFICULTY: 4/10
This is a bit easier than the last level. Start out by jumping onto the block
directly south from where you are. Jump onto the higher block from there, as
the block you just landed on moves upwards. Then, jump downwards again, and
then three times to the right. Now you should be at the part with the moving
spikes. This is all timing. Wait until the spikes are moving back towards
you, and pass the arrow, to jump. If you time it right, you should be able to
get to the arrow and beat the level before it comes back to hit you.
---
ROOM 20
DIFFICULTY: 6/10
This one's difficult because of the frustration factor. See the Ghost? See
how he's moving back and forth into that little row of safe spaces, in between
spikes? You need to wait until he walks out of that row, run in before he's
turned around and gotten back in himself, and then jump over the single block
of spikes that blocks you from the arrow. It's very annoying, because if
you're even just off by a little bit, rather than running through the one-space
wide path, you'll hit spikes and die. Of course, having no time to stop and
align yourself doesn't help. Keep your cool, and think of it as one swift
motion, and this level won't take you too many tries.
---
ROOM 21
DIFFICULTY: 6/10
The set up for this level is simple enough, and you probably can tell exactly
what do, but the challenge is in being able to do it. In this case, you start
out by heading up to the various stationary blocks at the top of the screen.
Climb up all of those, and then try to time your jump to land on the first
moving block. To time it right, try jumping when it's just past half-way
through it's path, moving towards you. Then, once you land on that one, wait
until it moves away and then back towards the stationary blocks. When it's
closest to the other moving block, jump. If you do that right, you'll land on
the next block. Once that one moves close to the arrow, just jump off of it,
and onto the last bit of land.
---
ROOM 22
DIFFICULTY: 5/10
Run ahead, until you reach the mini-staircase of blocks. Jump to the top, and
wait for the moving block to get close to you. When it does, jump onto it.
However, immediately jump off, towards the block closest to the arrow. If you
don't jump off right away, you'll fall to your death, as the moving block is
also a disintegrating block. If you land on the other block, you've got the
level beaten. Just jump one more time, to the right, to land on the arrow.
---
ROOM 23
DIFFICULTY: 6/10
This is a weird level. The largest stack of blocks has a hard to see block
behind it, which you should jump on. Just fall off of the block you start on
by walking left, being sure not to walk into the spike that you'll fall next
to. Jump left again, over the spike, and onto the one block. Try to move left
again, you'll push a block partially off of the stack. Now jump diagnoally
left-down, so you safely land on the ground. Walk so that you're underneath
the partially pushed block, and then move away. It should fall to the ground.
Jump onto the now fallen block, and from there, onto the arrow's spot.
---
ROOM 24
DIFFICULTY: 7/10
This level is evil. Start out by running to the right, up to (but not
touching) the spike block. Then, run up on the path that goes through the
water. Jump to the left, over the water, and onto safe land. Then, run down
to the only block you can jump on, and jump on it. Be careful to not hit the
spikes next to it in the process. Jump again, to the corner block, and walk
onto the moving platform. It'll move forward, allowing you to jump on the only
non-spike block of that wall. Then jump down, to the final row of land. Jump
over the spikes, onto the safe spaces. After two (hopefully easy) jumps,
you'll be on the arrow.
---
QUICK INTERMISSION
This guide was written by Matt Sokol, otherwise known by the screen name
Wlokos. If you are reading this guide and no credit has been given to me, then
the site you're on stole it. Do me a favor and just send me an email at
WlokosFAQ@hotmail.com, with a link to the guide from this site, so that I can
have it removed. You can find this guide, along with any other guide I write,
at www.gamefaqs.com.
Thanks. :D
---
ROOM 25
DIFFICULTY: 3/10
At first, this looks like it's going to be very hard. You're on the same
ground as two Mean Guys, who are only blocks from reaching you due to a bunch
of spike blocks in the middle of the level. However, it's actually very easy.
Run to your right, and stand next to the cylinder until they both are able to
run down, towards you. Once they start doing that, run to your left, up and
around the spikes. If all goes well, they'll get trapped in the middle of the
spikes, while you can safely jump onto the arrow to complete the level.
---
ROOM 26
DIFFICULTY: 9/10
This is incredibly annoying. What you'll have to do is this: Run diagonally
up-left when the Mean Guy is as far to the left as he gets. If executed
perfectly (and I mean absolutely 100% right), you can jump over the top spike,
and he'll be trapped inside them. If not done completely right, he'll hit you
and you'll die or he won't get trapped in the spikes. It's most likely going
to take a while to get this one right, because it's very difficult, but be
persistant and you'll get through it.
---
ROOM 27
DIFFICULTY: 1/10
Hold left and up for the entire level, starting the instant you can move. Yeah.
---
ROOM 28
DIFFICULTY: 5/10
Remember that black box that was randomly in an earlier room? No? Well,
regardless, it's back and it has a purpose now. Start this level out by
running over to it and jumping on top of it. Now hit 'B'. The block should
dissapear. Once that's taken care of, run back to the left, around all the
spikes, and to the spot that's directly left of the shortest stack of blocks.
(out of the 3 there). Run left a bit, into the blocks, and the top block will
be pushed partially off. Now, hit B. Your magical black block will appear
beneath you, giving you the height you need to jump up onto the stack. Push
the top block all the way off, then run onto it. Jump northwards, towards the
hard to see empty space that's at the edge of the room. From there, jump over
the lone spike and onto the arrow. You win.
---
ROOM 29
Difficulty: 7/10
This can be tough. Jump up onto the slightly higher ground, and from there,
onto the spring. It'll propell you into the air, high enough to reach the
moving block that's across the water. Be careful not to overshoot and end up
in the spikes, and just try to time it well. You'll probably need to move left
a bit to adjust your position as you get closer, so be prepared to do that,
too. Once you've done that, just run off of the block, onto the arrow.
---
ROOM 30
Difficulty: 3/10
Run all the way to the left, and then jump onto the wall. From there, jump up
onto the stack of two blocks. Jump onto the block in the middle of the water,
which is a dissolving block. As soon as you land, jump one more time, onto the
arrow.
---
ROOM 31
Difficulty: 5/10
This level is a bit weird. Grab the black block by standing on it and hitting
B (careful, don't push it off the edge), and then get yourself towards the
middle of the platform you're on. When Mean Guy is as far to the right as he
gets, jump off the platform, towards the top of the screen. As soon as you
land, hit B to drop the block, and jump again. This time you can land on the
arrow, and defeat this level.
---
ROOM 32
DIFFICULTY: 6/10
First off, you are going to be frusterated at this level, because of how
annoying it is to try to move around without touching the spike blocks.
Despite that, it's not too tough. Every spike block is on the ground in this
level. They are not in a pyramid shape, growing taller, despite what it sorta
looks like. I was fooled for a few minutes by that, so I thought I'd clarify
here. Anyway, onto the actual strategy:
Start out by walking around, in between the spikes, towards the top of the
room. Push the movable block that's on the ground up a space, so that it's up
against the room's edge. Then, jump onto the wall, and from there, onto the
black block. Hit B to pick it up, and bring it over to the stack of blocks
with the arrow on it. Jump onto the block you pushed earlier, and hit B to
release the black block as well. That'll give you the height you need to be
able to reach the arrow, and finish the level.
---
ROOM 33
Difficulty: 5/10
This level's pretty cool. The arrow is hidden behind a ghost, which is trapped
by a block. There's a switch (well, switch-block) in the top right corner,
which will move that block. Moving the block will let the ghost out, and
that'll let you get to that arrow. So, start out by running/jumping over
spikes to the switch. Once you land on it, watch as the block that was in
front of the ghost moves upwards, and jump off once the ghost is able to get
out. Now, make your way to the arrow, being careful to avoid the ghost. This
should be pretty easy no matter what, but if you're lucky enough for the ghost
to stay away from the arrow area once it's released, it's even easier.
---
ROOM 34
Difficulty: 1/10
Yep, 1/10. But, that's actually a typo. This level is really a 10/10 for
difficulty. You should be scared. Start out by running to the right, until
you hit the edge of the room. Then, run up, and push the block forwards once.
Look, the arrow was underneath the block. You win already. If you had to come
to the FAQ for this, you probably feel pretty stupid right now, don't you?
---
ROOM 35
DIFFICULTY: 3/10
This is another very easy one. Jump onto the partially obscured wall, and then
from there, onto the higher ground (being sure to avoid spikes in the process;
use diagonal jumps). Once you get up there, step onto the weird circle that
I'm pretty sure wasn't in any prior levels. It'll make all the ghosts
dissapear, leaving the path to the arrow clear for you.
---
ROOM 36
DIFFICULTY: 6/10
Ugh, another level with an annoying amount of spikes to run around. Oh well.
Start out by running to the right, to the edge of the room, and then jumping
over a spike and onto the black block. Hit B to grab it, and then jump back
over the spikes. Run to the left, jumping over the raised section of the
ground, so that you're directly south of the movable block. Push it forwards
as far as it can go, and then jump onto it. Hit B, to drop your black block,
and then jump from there onto the arrow.
---
ROOM 37
DIFFICULTY: 5/10
If you can land three jumps, you can do this level. Start out by moving
forward a bit to drop down to some lower ground, then wait for the moving
platform to come back towards you. Jump onto it, and wait for it to move back
to the right. Once it does, jump forwards onto the next block. When you do,
that block will start moving. Once it's close to the arrow, jump over the rest
of the spikes and onto the last bit of land.
---
ROOM 38
DIFFICULTY: 4/10
Run to the left, until you reach the spring. Once you do, jump onto it and
bounce over all the spikes, to the other side of the screen. Run towards the
ghost that's running arond inside the mushrooms, but don't actually jump in
yet. Wait, what the hell are mushrooms doing in here? Uh, anyway, run up
against the mushroom that's at the edge of the room, and then run to the left,
into the middle of that collection of blocks. You can't really see it, but
there's a switch, and it'll make the ghost dissapear. Run back to the
mushrooms and jump over, onto the arrow.
---
ROOM 39
DIFFICULTY: 8/10
Run to the right, and jump up onto the tallest cylinder. Jump onto the closest
floating block. Be careful, these jumps can be tricky. Once you're onto that
block, jump onto the next two, but not onto the final one yet. Wait until the
ghost is almost at the left edge of the screen, then jump. As soon as you
land, the block will dissolve. Jump again, and land on the safe ground. If
you timed it well, you can get to the arrow without being hit by the ghost.
---
ROOM 40
DIFFICULTY: 3/10
Run to your left, and jump up onto the block in the corner. That's a switch,
and it'll make a block float away, opening the exit to the level. Run back to
where you started, and then up through the spikes. Be careful, you've got to
avoid the dog. Once you get past that, just run into the entrance of the
castle, and you're done. Congratulations, you've beaten the first section of
the game! Say goodbye to The Wood, you won't be returning.
---
ROOM 41
DIFFICULTY: 5/10
This seems impossible at first, but it's actually pretty simple. Walk behind
the third block (from left to right), and push it forwards. Once it's pushed
as far as it'll go, jump onto the slightly raised ground that it's on to push
it all the way into the spikes. Now, jump over the fourth block, so that you
can push it back to the left. Line it up with the first block you pushed, and
push it forwards as well. Once it falls into the spikes, run onto it, and jump
over the remainder of the spikes, onto the row of safe land in the back. Now,
just run to the arrow and into the door.
---
ROOM 42
DIFFICULTY: 9/10
This is another one of those levels that starts you off on the same floor as a
Mean Guy, so he's already after you. Unfortunately, this one is much harder
than the others. Start out by grabbing that black block by running along the
path you start on, inbetween the spikes, and hitting B. Next, run back towards
where you were, until you end up next to a block. Jump onto it. Walk to the
right, until you fall off. Wait for Mean Guy to run close enough that he's
going to be trapped where you are right now, then jump up and to the right
again, onto the next block. If all goes well, Mean Guy is stuck where you
were. Go to the bottom-right corner. Now, this is the most difficult part.
Run straight upwards, towards the blocks and the arrow, and hit B to release
the black block exactly as you hit the space closest to the raised block. If
done properly, you'll avoid the Mean Guy as he runs out of where he was trapped
and towards you. If not, you die. Once you accomplish that, jump up and onto
the arrow.
---
ROOM 43
DIFFICULTY: 7/10
That guy near the arrow isn't a Mean Guy, don't worry. He's a Big Guy. Twice
the size, half the danger. Run to the left, to the block that's next to the
wall. Jump onto it, and from it, onto the wall. When the ghost has walked
right up next to the spike, jump over it and onto the portion of the wall that
the ghost is walking around on. Immediately jump down to the lower part of the
floor, doing you best to dodge both the Big Guy and the spikes. As soon as you
land, run to the arrow before you mess up and get hit by Big Guy.
---
ROOM 44
DIFFICULTY: 7/10
Run to the left, and jump up onto the highest floor. Push the movable block
upwards, past the dog, and so that it's lined up with the hole in that tall
structure of blocks to the right of you. That means that it should be one
space away from the wall. Be careful, don't let the dog get trapped in the one
space between the block and the wall as you're pushing it, or you won't be able
to move it out of the way without dying. Keep him on the other side of it.
Once it's lined up, push it to the right, so that it goes through the middle of
the block structure and into the spikes. Run onto it, and run diagonally off
of it and onto the arrow, being careful to avoid the spikes that are around
you.
---
ROOM 45
DIFFICULTY: 2/10
Run to the left, and jump onto the switch. See that block move up? Once it's
all the way up, run underneath it, and then to the arrow. Wow, that was hard.
---
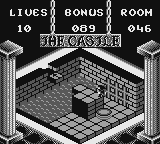
ROOM 46
DIFFICULTY: 4/10
Another easy one. Run to the spring, and jump onto it. Bounce yourself onto
the higher blocks, and run to the left. The block that's sticking out will
dissolve when you touch it, so jump as soon as you get there, onto the arrow.
---
ROOM 47
DIFFICULTY: 7/10
This looks harder than it is, but it's still tough. Run down the stairway of
blocks that you start out on, and then up the next one. Once you're all the
way to the top, run all the way to the other end of the screen, on the safe
blocks. Now, run partially back. See how one of the blocks dissolved? You
need to fall through it, timing your fall so that you land on the moving block
below. Time it so that you start to fall as the block starts moving back from
the non-arrow side of the screen. If you land on it, run onto the arrow once
it gets over there.
---
ROOM 48
DIFFICULTY: 9/10
This is incredibly annoying and difficult. The first thing that you do is run
all the way down the row of blocks you start out on, so that you end up in the
bottom right corner. After that, jump over the spike, and onto the next stack
of blocks. Jump up the mini staircase of blocks, and then onto the black
block. Hit 'B' to get it. Here's where this level becomes incredibly
annoying. Jump to the left, and try to land on the square of safe ground
amongst all the spikes. For whatever reason, this is a very difficult jump.
Once you manage that, jump downwards, to the next two spots that are safe.
Stand on the on that's closest to the arrow, and hit B to release the black
block. From there, jump onto the square that's next to the arrow, and from
there, onto the arrow.
---
ROOM 49
DIFFICULTY: 5/10
This level gets bonus points for looking really cool, but it actually isn't
very difficult. Time your first jump so that you can jump directly to the left
and land on the first block. It'll dissolve as you land on it, so immediately
jump to the left again, onto the second one. It'll also dissolve, so jump to
the left one last time, onto the arrow.
---
ROOM 50
DIFFICULTY: 5/10
Run towards the top of the screen, of of the raised blocks. Don't bother
trying to get to the arrow at the moment, it's not possible yet. The switch is
in the bottom left corner, so get all the way to the left side of the screen.
Now, jump over the holes in the ground, onto the safe spot in the middle, and
then onto the switch. That'll make the spike blocks that were protecting the
arrow dissapear. Jump back across the holes, and run to the arrow.
---
ROOM 51
DIFFICULTY: 5/10
There's a Big Guy behind you. His movement pattern is this: He'll walk across
the whole stage. Just run across the free spaces, in between the spikes, so
that he doesn't catch up to you and kill you. I'm not going to bother with
"Run up, then left, then..", because that's pointless here.
---
ROOM 52
DIFFICULTY: 6/10
Start out by jumping onto the movable block, without pushing it forward. Walk
off of it, to the left, and then push it to the right until it's next to some
spikes. Jump onto it again, and this time walk off towards the bottom of the
screen. Push it upwards, all the way onto the spikes. Push it as far as you
can, without actually walking onto the spikes yourself. Now jump onto it, and
from there, to the arrow. That's probably not the intended method for this
level, but it's a hell of a lot easier than using those stacks of blocks in the
top-left corner.
---
ROOM 53
DIFFICULTY: 5/10
Look at the movable block. Directly to the right of it, notice that there's an
empty space. It's hard to see, so you might normally not notice it, which
would make this level seem impossible. Jump onto/over the block, so that you
end up on the empty space. Push the movable block one or two spaces to the
left, and then upwards until it's against the wall. Push it to left again,
until it's in the top-left corner. Now you can jump on it, and use it to get
onto the stack of two blocks. Jump from each stack of blocks to the next,
without falling on the spikes in between each, until you're on the very tallest
one. Now jump again, holding up and right, so that you land on the arrow.
---
ROOM 54
DIFFICULTY: 6/10
Move to the left until you're up against the spikes, and then run down towards
the ghost, but not past him. Wait until he goes up above the spikes, towards
the rightmost wall, and then run into his path (but not past it) and down
towards the spikes that are blocking the Mean Guy from you. Once you get to
the bottom, without hitting the spikes, run up to the arrow. If you're past
enough, the ghost won't hit you, and the Mean Guy should remain trapped.
---
ROOM 55
DIFFICULTY: 4/10
First, go jump onto that black block and hit B to pick it up. Once that's
done, run to the movable block, which is next to one of the cylinders. Push it
up towards the spikes, as far as it will go, and then jump onto it. Release
the black block on it, by hitting B again. Now, just jump from the black block
onto the arrow.
---
ROOM 56
DIFFICULTY: 4/10
To begin, jump from the starting point onto the stack of black blocks. Hit B
to grab one, then walk to the wall of triangles that surrounds the higher
ground where the arrow is. Stand so that you're directly next to a part of the
wall, and then hit B to release the black block. Go back, and grab another
block. Bring it over to the first one, which you should then jump onto. From
there, jump again, onto the triangle wall. Release the second black block, and
jump from it onto the group of blocks where the arrow is.
---
ROOM 57
DIFFICULTY: 3/10
Run to the black block, which is on the left side of the screen. Grab it, and
then run back to the stairs that you started on, but don't jump back up them.
Instead, jump up the other staircase, which leads to the arrow. When you get
to the spot on the stairs where you can't proceed further, release the black
block. That will give you the extra jump that you need to get over the highest
point of the stairs, and then down to the arrow.
---
ROOM 58
DIFFICULTY: 7/10
When the level starts, don't move. Watch the two dogs move. The one to the
left is a bit further back on his route than the one on the right, right? When
the one at the left hits the bottom of the screen and starts going back up, run
behind him and follow. Once he's close to turning around, jump over the middle
row of spikes, and onto the right dog's path. If all goes well, that dog will
have already gone past where you land, and will be heading back to the bottom
of the screen. Quickly, run up to and jump upon the triangle wall. From
there, you can run to the arrow.
---
ROOM 59
DIFFICULTY: 9/10
This is a tough one to figure out, but once you know how to do it, it's not too
hard. When the level starts, don't move for a few seconds. Once the mean guy
is on the arrow space, grab the black block and run to the bottom of the
screen. Jump onto the staircase of blocks, and climb it as fast as you can.
Get to the top before mean guy gets there, because he can kill you if you're
too low. Once you get to the top, walk to the block that isn't against the
bottom of the screen, and release the black block. Walk off of it, back onto
the staircase, and then push it off. It should fall on the ground, blocking
mean guy's ability to walk to the north. On occasion, it may fall on his head.
If that happens, you can't win, so walk onto the spikes. If it does land on
the floor, though, jump off of the staircase, staying up against the eastern
edge of the room. Once you're in the top-right corner of the room, run to the
arrow and exit the room as fast as you can. If you're quick, mean guy won't
reach you in time to kill you.
---
ROOM 60
DIFFICULTY: 3/10
This is incredibly easy. Jump onto the first set of two blocks. The leftmost
block of the next set of two will move if you land on it, so either avoid it or
jump quickly. The rightmost block will move for the final set, so do the same
for that. I suggest just jumping from each set to the next as fast as you can,
because it's not hard at all. Once you reach the other side, you're on the
arrow.
---
ROOM 61
DIFFICULTY: 6/10
The dog won't actually hit you, but he runs back and forth in front of where
you start, blocking off the easy path. Wait for him to come up close to you,
and then once he runs back, run after him and immediately to the right.
However, that first block on the right will move as you touch it, so jump or
run forward to the next block immediately. Once that's accomplished, you can
just run to the arrow.
---
ROOM 62
DIFFICULTY: 7/10
Start out by running inbetween all of the spikes, until you get to the spring.
Jump onto it, and bounce yourself up to the block that's in the top-right
corner of the room. As soon as you land, it'll start moving, but you don't
move with it. Jump right away, and land on the arrow.
---
ROOM 63
DIFFICULTY: 9/10
This is pure platforming skill. There's not much I can tell you. The
spikeblock/safeblock location will switch each time they hit a wall, and the
safe block crumbles as soon as you touch it, making this even harder. Be sure
that, after you jump off of the safe block, you don't end up landing on the
spikes next to the arrow. Good luck.
---
ROOM 64
DIFFICULTY: 6/10
Start out by grabbing the black block. Once you've done that, return to the
spot that you started at, but move over to the left side of the table (or
whatever you want to call it), rather than the right side. Jump onto the
blocks that are in the middle of all the spikes, and from there, onto the other
side of the room's safe ground. Now, release the black block. Push it to the
right, until it blocks the dog's movement. Now that the path is clear, jump
over it, and run to the arrow.
---
ROOM 65
DIFFICULTY: 8/10
This is incredibly annoying. Start out by running to and jumping on the only
moving block. When it reaches the very peak of it's path, jump onto the very
tall stack of blocks. If you mess up, you'll fall onto a hard to see spike, so
be careful. Now, you have to land a jump onto the arrow, which is surrounded
by a ton of spikes. Just try to land it, there's no advice I can givr you to
make it easier. Once you've done that, the level's complete.
---
ROOM 66
DIFFICULTY: 7/10
This is a bit difficult to explain, but here we go: There's a mean guy behind
that wall you start out next to, so you'll have to run through this level.
Hold up, and jump as soon as you get to the water. The block you land on will
crumble, so don't stop running, and you'll stay safe. Once you reach the edge
of the stage, jump again. This time, you're jumping towards the arrow, and as
soon as you land on it, exit the room. If you stop moving for even a second,
you'll die.
---
ROOM 67
DIFFICULTY: 5/10
Run to where the big guys are. Wait for the first one to walk by you and run
past him, stopping in the middle of the two guys' paths. When the second one
also passes you by, run across his path before he turns back again. Run to the
arrow from there. The closer you are to the top/bottom of the screen (without
being on spikes, of course), the easier this is.
---
ROOM 68
DIFFICULTY: 8/10
This level is very annoying, but if you have good control over where Pinocchio
lands/moves by now, it won't be too bad. Start out by jumping to the right,
onto the empty space amidst the spikes. From there, jump onto the black block,
and pick it up. Jump back to where you started. This time, run downwards,
until you're at the first space without spikes to the right of you. Now walk
to the right, but be sure to not walk into the spike block, only walk up next
to it. Release the black block, and then jump over the spike. Run to the
movable block in the bottom-right corner, avoiding the spikes, and jump behind
it. Push it to the left until it's next to the spikes. Jump onto it, and walk
down to fall off. Push it all the way up, until it hits spikes. Jump on it
again and walk off to the left. Push it to the right, and jump on/go down
again. Push it up to the arrow, but not all the way under. If you do push it
all the way under, you can't win, and you have to start over. If not, jump on
it, and from it to the arrow.
---
ROOM 69
DIFFICULTY: 6/10
This room's just about making one tough jump. Run to the left, until you hit
the wall. Run up, and jump onto the slightly raised land, but don't go
further. Jump to the higher ground, but be careful. If you run upwards again,
you'll hit spikes blocks that are high above you, but not high enough to walk
under. Instead, you have to jump both to the left and upwards in one jump, to
land on the arrow. Once you do that, the level's done.
---
ROOM 70
DIFFICULTY: 3/10
Run behind the movable block, which is partially obscured by the column/higher
blocks. It's near the bottom-right corner. Once behind it, push it over to
the staircase of blocks, so that you can use it to get onto the stack of two.
Proceed to jump up the whole stairway, and run along the highest blocks, until
you reach the downward staircase. Just run across, without stopping. Some
blocks will crumble, but it doesn't matter as long as you keep moving. After
reaching the bottom of that, run to the left to get to the arrow.
---
ROOM 71
DIFFICULTY: 4/10
Jump onto the blocks that are in front of you. Your next jump is onto some
blocks that move away from you as soon as you land, so jump again right away.
Otherwise, you'll fall into the water. If you do jump at the first possible
moment, land on the final blocks in the water, and jump or run off of them and
onto the arrow.
---
ROOM 72
DIFFICULTY: 6/10
Jump onto the spring that you start out near. You've got to jump onto one of
the tall cylinders, without dying. That's a bit tricky, because you can't just
jump forwards, or you won't get all the way over the spikes. When you bounce,
wait for around a third of a second, then hit up. If you time it right, you
can land on a cylinder. If not, try again. Once you're on a cylinder, just
jump forwards, and you'll land on the land at the other side of the screen,
allowing you to run to the arrow.
---
ROOM 73
DIFFICULTY: 7/10
This is hard to write a strategy for, but it's pretty self explanatory.
X X X X <- The spikes are in that sort of pattern, with two different spikes
X X X moving around. You have to jump in between the spikes,
X X X X timing yourself so as to not get hit by the moving ones.
X X X You should do it from either the leftmost or rightmost side of
X X X X the room, not in the middle.
---
ROOM 74
DIFFICULTY: 7/10
Push the movable block next to the lowest stack of blocks on the left side of
the room, without hitting any spikes in the process. If the ghost comes near
you, jump onto the block until it goes away. Once it's next to the low stack,
jump from it to the stack, and from there up the staircase. Be careful,
becuase the highest point of the stairs is not against a wall - if you go too
far, you'll fall onto a spike. If you get to the top safely, jump to the left,
and just hold left so that you go far enough to land on the arrow.
---
ROOM 75
DIFFICULTY: 7/10
Walk one space forwards, so that you're past the black block. Run downwards
and jump over the spike that's beneath you, landing in between that row of
spikes and the next one. Run to the left and jump back up over the spike, onto
the black block. If done quickly, that will trap the mean guy in the rows of
spikes. If not, he'll kill you. Grab the black block, and run forwards. As
soon as you reach the hole in the closest row of spikes, release the black
block, trapping the mean guy permanently. Once that's been accomplished, you
can take your time and walk to the arrow.
---
ROOM 76
DIFFICULTY: 8/10
I spent 10 minutes trying to beat this level before I realized that the bottom
block in the stack behind where you start is pushed out a bit, and it's a black
block. Jump onto it (try to jump into the stack, you'll land on it) and grab
it. Run to the left, jumping up onto the higher block and diagonal jumping
around the first spike block. Once you get to the two spike blocks in a row,
release the black block and jump over them. Wait for the big guy to walk up to
the corner in front of you, and as soon as he turns around, jump up and follow
him. When he reaches the other corner, do a diagonal jump onto the arrow,
before he hits you. It's a bit tough and might take a few tries, but if you
stay one space away from the big guy at all times, you can do it.
Oh, and before you ask, there's no point to that cylinder in the middle. At
least, none that I can figure out.
---
ROOM 77
DIFFICULTY: 5/10
This looks hard, but it's not. Walk forwards, falling to the ground, but don't
go too far forwards or you'll land on a spike. Wait for the big guy to pass
the spike that's in front of you, then jump over it and run into the middle of
the 9 squares that are inside the spikes. When he passes in front of you
again, run forwards and jump over the next spike, onto the arrow.
---
ROOM 78
DIFFICULTY: 6/10
Run along the only possible path, which starts out by going down. The black
and white stripes are land that you can walk on. When you get to the Dog, time
your jump so that you start moving just as he turns around, towards the spring.
If you get past him, jump on the spring and go as far north as you can. That's
where the arrow is located.
---
ROOM 79
DIFFICULTY: 5/10
This is a bit odd. Start out by running/jumping along the black and white
path, until you reach the blocks. Jump up the stairs, and once you reach the
top, step onto the top-rightmost block. It'll break when you step on it.
However, rather than falling to your doom, you'll start moving in the direction
that you're facing. The wierd floating thing you're on now is a new object
that we haven't seen until this point. It moves in whatever direction you're
standing on. As in: If you're standing on it's top-left corner, it'll go that
way. If you're on the bottom, it'll move downwards. Float your way to the
arrow, and then jump onto it from slightly far away - otherwise, it'll float
over the arrow, blocking you. If that happens, float away from the arrow, and
try again.
---
ROOM 80
DIFFICULTY: 8/10
This is very difficult, unless you follow my exact instructions. Once the
level starts, wait for around a third of a second, then jump up the staircase
of blocks as fast as you can. On the second highest block, jump immediately
towards the block that's moving around. Once you land on it, jump again, this
time to the arrow. The block crumbles, so be quick. If you can execute that
in one fluid motion, you'll win. Otherwise, something will go wrong, and
you'll have to try again.
---
ROOM 81
DIFFICULTY: 7/10
It's time for another mean guy stage. Jump over the ground in front of you and
onto the triangle wall. Walk to the black block, but don't stand directly on
it. Stand so that you're halfway on the black block and halfway on the
triangle wall. Grab the black block, and you should still be standing on the
triangle wall, rather than on the floor. Now, walk as far to the right as you
can go without touching the ground. Walk up, falling to the ground, and
immediately release the black block and jump back behind the triangle wall.
Run to the left, luring the mean guy down to the wall, and then run to the
right, trapping him. Jump up the staircase, past the top, falling to the other
side of the room, and run to the arrow. Once you're on the arrow, the mean guy
will escape his trap, but it won't matter at that point.
---
ROOM 82
DIFFICULTY: 9/10
Another level with the weird floating platform that you control, and an
incredibly difficult one. Start out by jumping onto it, from the top block on
the stairs that you start out on. Float to the black block, going in between
the spikes that are in your way. Jump off, grab the block, and jump back on.
Float back through those spikes, and then down to the safe part of the left
wall. Float up a bit, and jump onto the safe block. Run/jump up, use the
black block, and jump from it to the arrow.
---
ROOM 83
DIFFICULTY: 7/10
This is all about jumping from block to block. There's not much for me to tell
you, the path is obvious. Just be warned: The third and fifth floating blocks
will move once you land on them, so jump again quickly. Other than that, this
is just a test of your platforming ability.
---
ROOM 84
DIFFICULTY: 6/10
This is another level that loooks a lot harder than it is. Jump diagonally
into the middle of the room. Jump again, to the bottom-right corner of the
room. Run onto the circular switch, which will kill the mean guy in the
bottom-left corner. Jump back into the middle, and then into the now vacant
bottom-left corner. Step on the switch that resides there, and step back off
of it when the moving block is off of the arrow. Now jump back into the
middle, and then to the top left, to get to the arrow.
---
ROOM 85
DIFFICULTY: 5/10
The mean guy in this level moves slower than usual, making this level pretty
easy. Run to the right when it starts, jumping over the spike that blocks you
from the bottom right corner of the screen. Once there, jump up over the other
spike that's in your way, and then run up until you're parallel with the block
that's the third in that series of four, counting from the bottom up. Jump
onto it, and it'll move towards the arrow, letting you run right off of the
block and onto the arrow.
---
ROOM 86
DIFFICULTY: 6/10
The only challenge here is getting past the ghost. Push the block onto the
spikes, and then jump onto it. From there, wait until the ghost is in one of
the top corners of the safe area, and then jump into it. Try to run directly
to the arrow if you can. If not, just do your best to manuever around him.
Worst case, you'll have to try a few times before you get lucky. Hopefully you
can do it on your first try, though, like I did.
---
ROOM 87
DIFFICULTY: 6/10
Jump onto the spring, as far to the left of it as you can. Just hold left, and
unless you jumped on its right side, you'll get over the wall of spikes. Once
past it, jump on the next spring, this time landing on its right side, giving
you enough height to get over the wall again, this time into the arrow's area.
Once you land, just run onto the arrow.
---
ROOM 88
DIFFICULTY: 6/10
Jump onto the blocks that are to your right when you start. Get against the
right edge of of the room, on the lower blocks, and push the block in front of
you onto the spikes. Grab the black block that that will reveal, and then push
the block a little further. Just don't go too far, or you'll be on the spike
and die. Once it's as far as you can get it, jump onto it. Walk as far up on
the block as you can be without falling off, and then release the black block.
Get as far up as you can on that one too, and then jump to the other side of
the room. Once there, run to the arrow.
---
ROOM 89
DIFFICULTY: 8/10
This is the worst level so far in the game, annoyance-wise. You have to walk
in between tons of spikes, jumping over other spikes that are hard to see.
Follow the obvious path, until you're at the end of the second row of safe
blocks. Jump to the third row, because there's a panel of groundspikes in
between the two. Once at the end of the third row, jump to the fourth row,
becuase there's water blocking you this time. Once at the end of the fourth
row, rejoice, becuase you have conquered this level.
---
ROOM 90
DIFFICULTY: 9/10
This is even worse. You have to push that movable block all the way to the
left side of the screen, then up against the spikes, so that you can jump over
them and then to the arrow. However, there's a ghost walking around randomly,
that you have to try to avoid. It's basically about trying again and again
until you get lucky enough to manage the process without him hitting you. Just
do your best to keep your distance, and try to get that block pushed over as
fast as you can, so that the ghost as less of a chance to kill you. Good luck.
---
ROOM 91
DIFFICULTY: 5/10
Well, you've exited the castle. Now, you're.. in the whale? Finding the
whale? Well, it says "The Whale", so interpret it as you wish. At any rate,
start out by getting to the spring. All you have to do is time your jump so
that you can get over the moving spiky block. Do that by waiting until it's
moving down, around halfway to the bottom of its path, and then bounce from the
spring to the little black and white strip next to the arrow (hold left). Once
on the strip, just jump to the arrow.
---
ROOM 92
DIFFICULTY: 5/10
When you start, it's really hard to tell where you are relative to everything
else, due to the limited GB mono graphics. Walk downwards, and everything
should become clear. Now, get over to the black block, avoiding the water in
the process. Grab it, and go all the way back to where you started. Once
there, release the block, and jump from it to the arrow.
---
ROOM 93
DIFFICULTY: 8/10
As is common with ghost levels, this is all about getting lucky. Wait until it
goes up into the higher half of the level, then walk left onto the floating
controllable platform. Quickly, float your way around the starting platform
and the spikes, towards the arrow. If you're lucky, the ghost will stay out of
your way long enough for you to get to and jump on the arrow. If not, try
again. Eventually you'll get it.
---
ROOM 94
DIFFICULTY: 4/10
Jump across the blocks, without falling into the water. When you reach the
long line of them, run all the way to the left. That'll make a block crumble,
and you'll fall onto a switch. The spiked block will go away, and you'll be
able to jump to the arrow. A nice break from the annoyances of the last level,
though you could get quite frusterated if you didn't know where to look for the
switch, I suppose..
---
ROOM 95
DIFFICULTY: 7/10
This level has a lot more stuff than it needs to have. Start out by jumping
onto the black block, and grabbing it. After that, run to the staircase and
jump to the top, then make a big jump to the black/white ground in the bottom
right corner. Release the black block, giving you the height you need to jump
to the next black and white spot, next to the arrow. Once there, you're next
to the arrow, so I don't think I need to explain further.
---
ROOM 96
DIFFICULTY: 8/10
This is a bit tricky. Walk onto the middle block of the set that you start on,
and jump to the next group of three. Walk all the way to the end of that one,
and jump to the single block that's closest. That block is a crumbling block,
so quickly jump to the other nearby one. Now, the moving block is also a
crumbling block, which complicates things. Wait until it's about to turn back
towards the arrow, then jump towards it. Once you land, jump again, and you
should make it.
---
ROOM 97
DIFFICULTY: 6/10
Run over the black and white land, and jump onto the block at the other end of
the room. It'll start moving up and down. When it's at the highest point of
its path, jump off of it and onto the blocks that are in front of it. Run to
the top-left corner of the room, and you can hold right from there to bounce
off of the spring and land on the arrow.
---
ROOM 98
DIFFICULTY: 4/10
The block that's nearest to the one you start out on is movable. Push it onto
the water, as far as it can be pushed without you dying. That means that you
can push it a little bit further into the water than normal, as long as your
guy doesn't go too far onto the water tile. Once that's done, jump onto it.
Get as close to the other side of the screen as possible, and jump. You'll
land on the other side, with safe passage to the arrow. That's not the
intended method to beat the level, but it's the fastest and it's very easy to
do.
---
ROOM 99
DIFFICULTY: 7/10
This is simple, but annoying. Start by running up to the spikes that you start
out facing. Wait for the big guy to run past you, then run into his path and
immediately run upwards. If you do that fast enough, he won't turn around in
time, and you'll be ahead of him. Jump on the block that should be in front of
you, and it'll move up, allowing you to get to the arrow.
---
ROOM 100
Difficulty: 10/10
Here it is. The final room. It's been a long game, but this is, by far, the
hardest and most frusterating level of them all. You've got to navigate your
floating platform in between all of those spikes, and even one mistake will
send you back to the start. It's not fun, and it doesn't help that there isn't
much advice that I can give you. Take it one row at a time, and be sure to
never try to move in a diagonal direction. Move left, then get back on the
center of the platform to stop it before trying to go down. If you're careful,
you'll get through it eventually. Don't let yourself get frusterated, though,
or you'll never beat it. Good luck.
---
ROOM 101 -THE END-
Enjoy a quick final cutscene. I won't spoil it for you, since this has been a
very plot heavy game.
And, with that, the walkthrough portion of the guide is over!
---***---
[ABF]
---
ENEMIES:
Dog [Levels: 1, 6, 10, 17, 27, 40, 44, 58, 61, 78]
The Dog is no threat. All he does is walk back and forth, turning around when
he hits the end of the room or a block. Just run past him. There are two
different sprites that are the same exact enemy movement wise, so I refer to
both as dogs.
Ghost [Levels: 4, 12, 17, 20, 33, 38, 39, 43, 54, 72, 86, 90]
The Ghost walks around at the same speed as the Dog. However, rather than
walking back and forth in a straight line, he sometimes walks in a seemingly
random pattern, making him a bit harder to avoid. Be careful when the Ghost is
around.
Mean Guy [Levels: 7, 12, 14, 25, 42, 54, 75, 81, 85]
This guy really is mean. As soon as you step onto any ground that's at the
same height as the ground he's on, he'll run at you much faster than you run,
and you die as soon as he touches you. Avoid touching the floor he's on at all
cost, unless you know you can reach the arrow before he reaches you.
Big Guy [Levels: 43, 51, 67, 76, 77, 99]
Big guy may be taller than Mean Guy, but he's much nicer. Sadly, he's not nice
enough to not kill you if he touches you. He'll just walk in circles. You
won't have an issue with him unless he's in a small space.
---***---
[ABG]
---
GLITCHES AND OTHER RANDOM STUFF:
When you get an extra life, after getting 500 bonus points, the screen has a
typo: 'EXTRA LIVE'
When you die, you don't actually lose a life.
You can skip to any level you want, at any time. Pause the game, and hit up to
lower the room by one, or hit down to raise it by one. Yeah, up is down and
down is up, I don't know why. This is probably something that the programmer
had in the game for his own testing purposes, but then he forgot to take it
out. Well, it's useful. Room '101' isn't actually a level, by the way, but
the ending sequence.
The ending screen, which says that you now live with the whale, is very
awkwardly written.
---***---
[ABH]
---
LEVEL PASSWORDS:
FFGMS Start game at level 6.
QQXRB Start game at level 11.
W26RJ Start game at level 16.
DSZDD Start game at level 21.
LKSX5 Start game at level 26.
D1H4R Start game at level 31.
D1BTP Start game at level 36.
R53HR Start game at level 41.
BQYSZ Start game at level 46.
4KLX8 Start game at level 51.
8WNPY Start game at level 56.
DXXLG Start game at level 61.
1V4J4 Start game at level 66.
LF2LK Start game at level 71.
JSDJY Start game at level 76.
CWSPU Start game at level 81.
TLZ5H Start game at level 86.
1NY1H Start game at level 91.
JZRUT Start game at level 96.
Those are copied directly off of the codes section of GameFAQs, I know. It's
not plagerism, I'm the one who submitted them. Note the "Contributed By:
Wlokos" note underneath them on the page. K?
---***---
[ABI]
---
POSSIBLE FUTURE UPDATES
I'm probably not totally done with this guide, although it's mostly complete.
I need a bit of a break before having to replay all 100 levels, but I plan on
adding a section on the maximum possible bonus points per level. I might also
add a few extra strategies, specifically for levels with faster, harder to
figure out routes. That's a bit more iffy, though. I may add an objects
section too, if I look back on this in a week or two and decide that it needs
it, but I don't really think that it's neccesary now, so probably not. That's
about it, barring minor revisions. This guide is, for the most part, complete.
---***---
[ABJ]
---
CREDITS
Thanks to the user MegamanX of GameFAQs, for getting me to try this game in the
first place. Without him, there'd have been no guide.
Thanks to CJayC for keeping GameFAQs running.
Thanks to Holt, for being cool.
And then, thanks to me. I did write this whole thing, after all.
---***---
ETC
---
If you want to use this guide on your site, just send me an email. Anybody who
asks can have it, barring extreme circumstances.
---
This guide was written by Matt Sokol, otherwise known as Wlokos. If it has not
been credited to me under one of those names, it has been plagerized. Please
send me an email at WlokosFAQ@hotmail.com to let me know, so I can sort that
out. Thanks.
---
This guide will never be sold for profit. If you purchased this guide off of
Ebay or any other site, you have been ripped off. Tell me if that happens, via
email, so that I can deal with whoever's stealing my work.
---
END FILE